Estimated reading time: 6 minutes
Content
Under the pseudonym the Zipper fixer we show you how to make zips to size, shorten zips, replace runners, etcetera.
Attaching Topstops
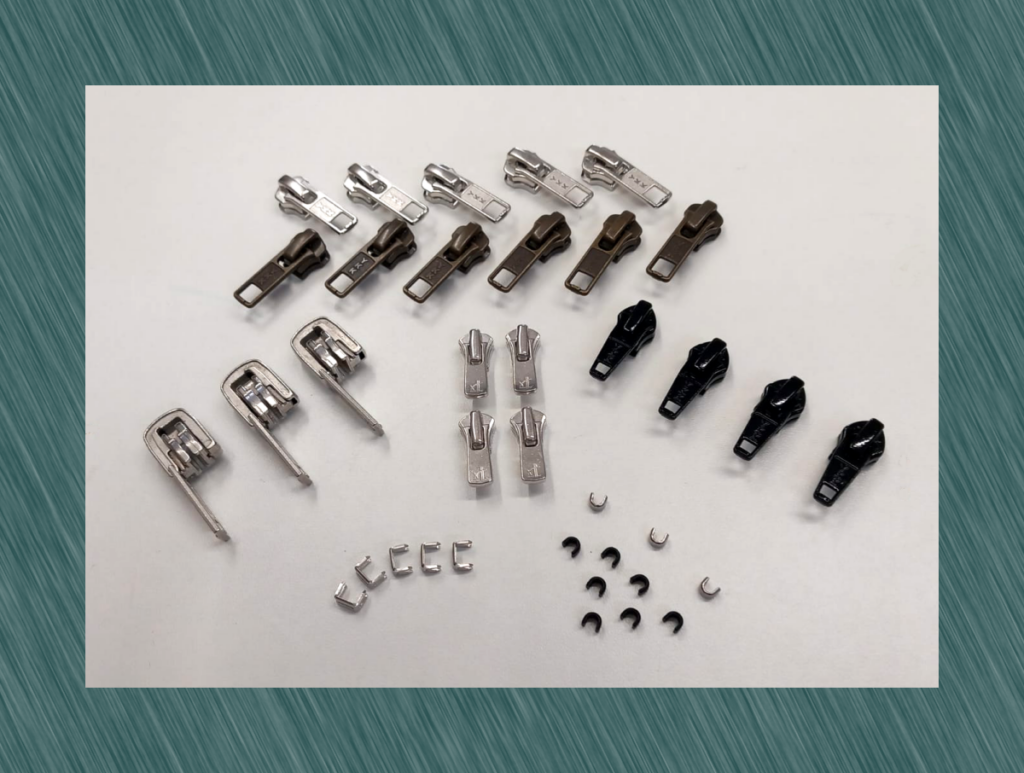
For attaching topstops you will need your bent pliers. Please read Making zips to size – the basics for more information about the tools used for making zips to size. Topstops are made of metal and available in silver and black. For light colored zips use the silver stops and for darker zips the black topstops. When shortening metal zips it’s logical to use the topstops that are the same color as the teeth, because it will be harder to see that the runner was replaced. It looks more original. When shortening or changing metal zips with silver teeth, use the silver topstops, but the zips with dark teeth will need the black stops. Topstops are available in our shop: beautyvof.nl together with runners and bottomstops.Attaching the bottomstop
Bottomstops are also made of metal and available in silver. When altering a dark zip it can be too striking, (especially in a zip that is exposed) that is why we recommend using a permanent marker to color the stop dark. Preferably after attaching the bottomstop due to staining your hands and tools. When Making zips to size attaching bottomstop and topstops, we start at the top of the zip. With that we mean: attaching the topstops.Time required: 5 minutes.
Making zips to size – attaching bottomstop and topstops
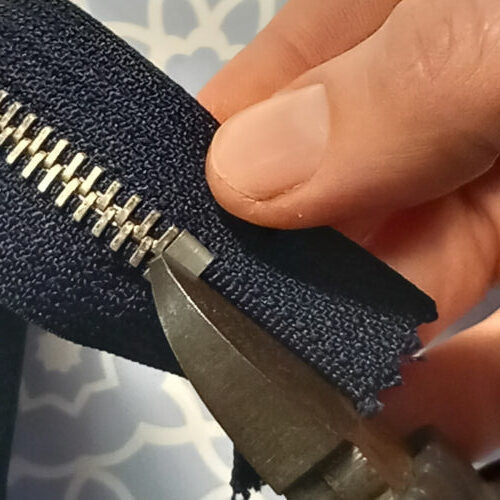
- Removing the Topstop
Use your side cutter pliers for this and remove the old topstops
- Zip without topstops
Now the topstops are removed, we start by attaching new topstops
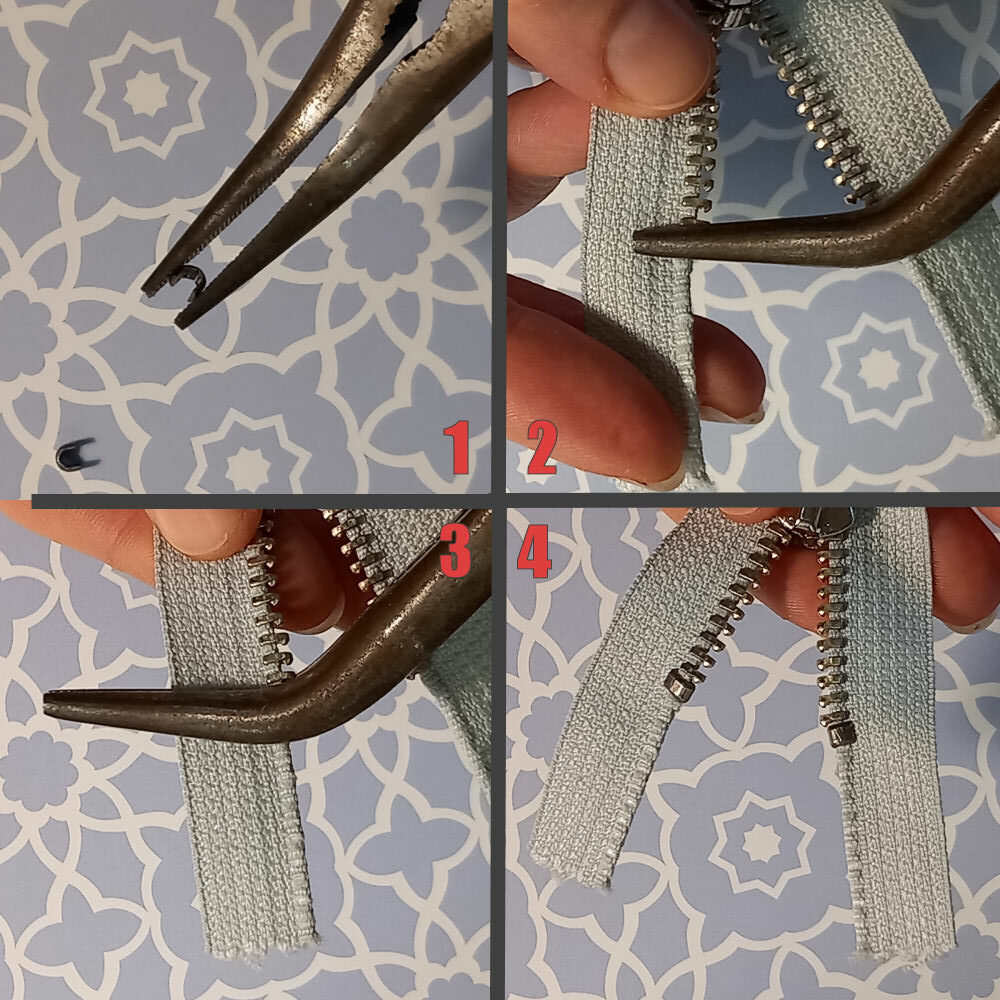
- Attaching new topstops
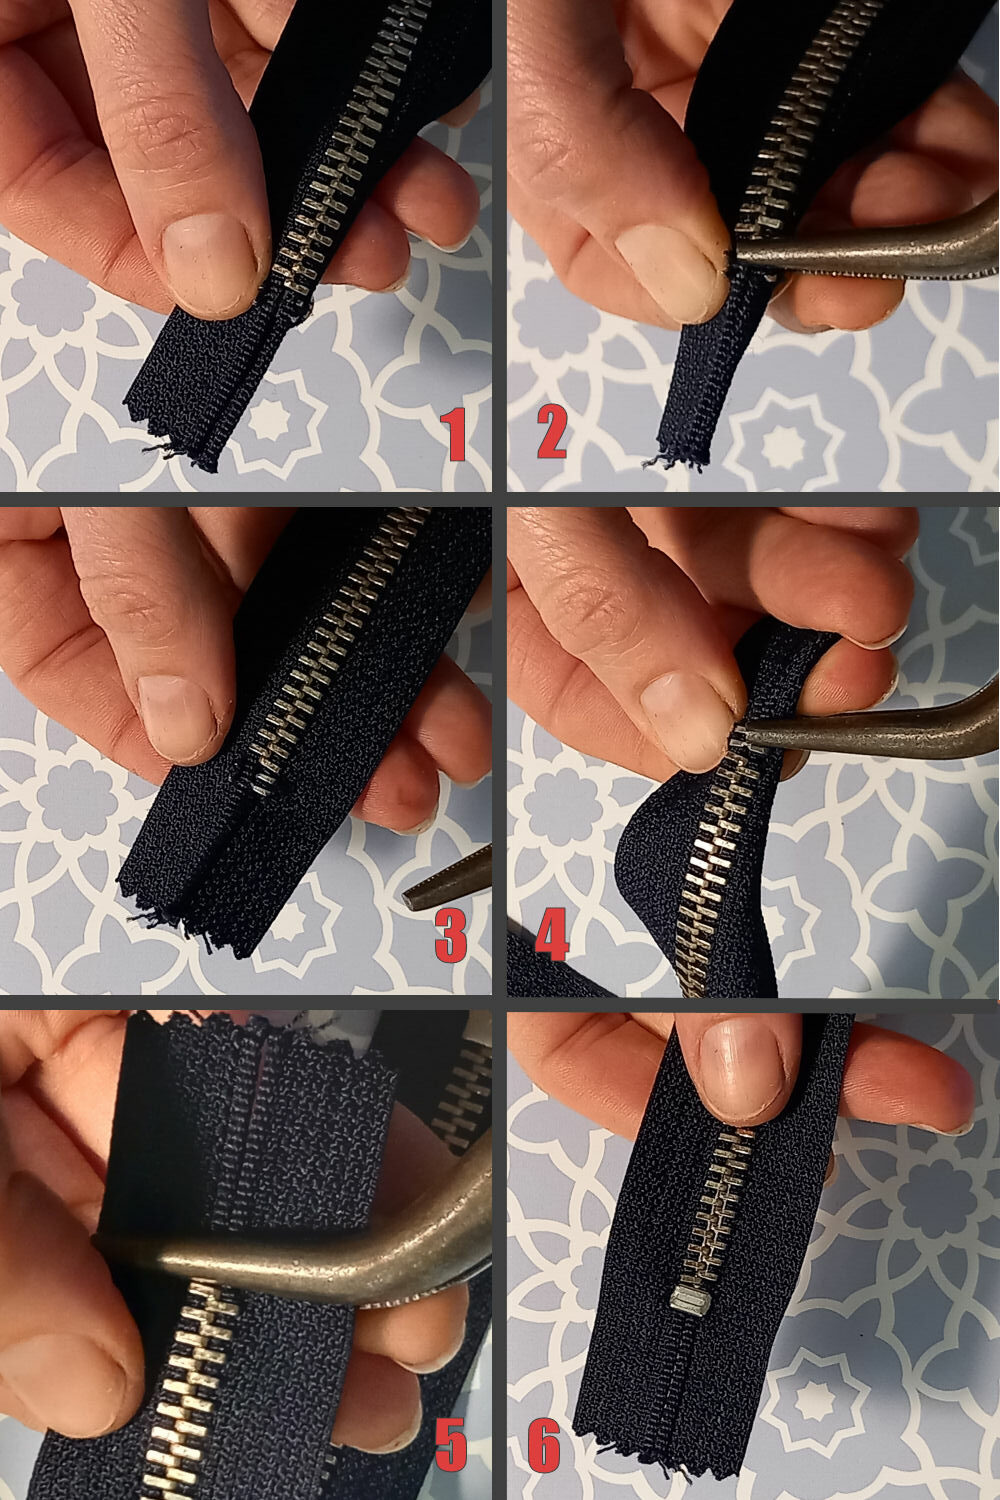
Place a topstop in the bent pliers as show on the picture (1). Next you can slide the stop over the tape just above the last tooth and clip it on (2). Now place the pliers slightly forward over the stop and pinch it again (3). And attach the second topstop (4).
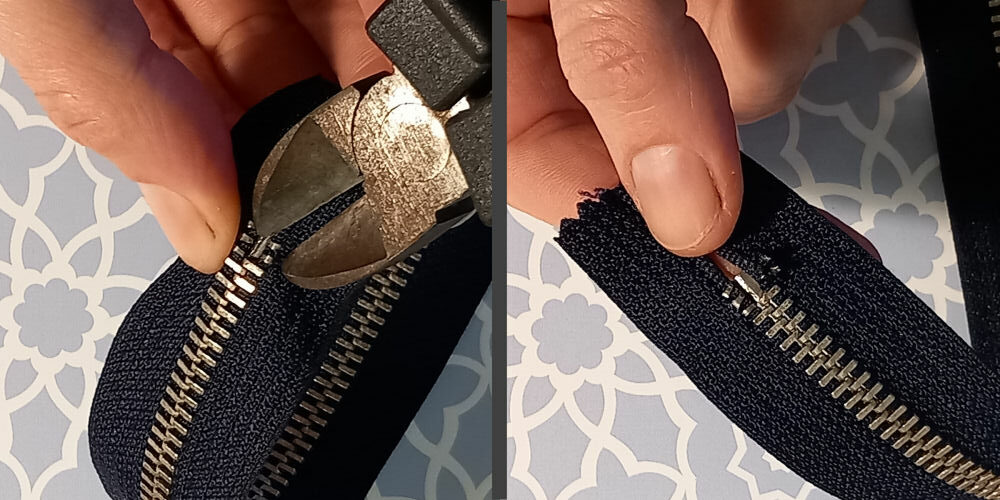
- Removing the bottomstop
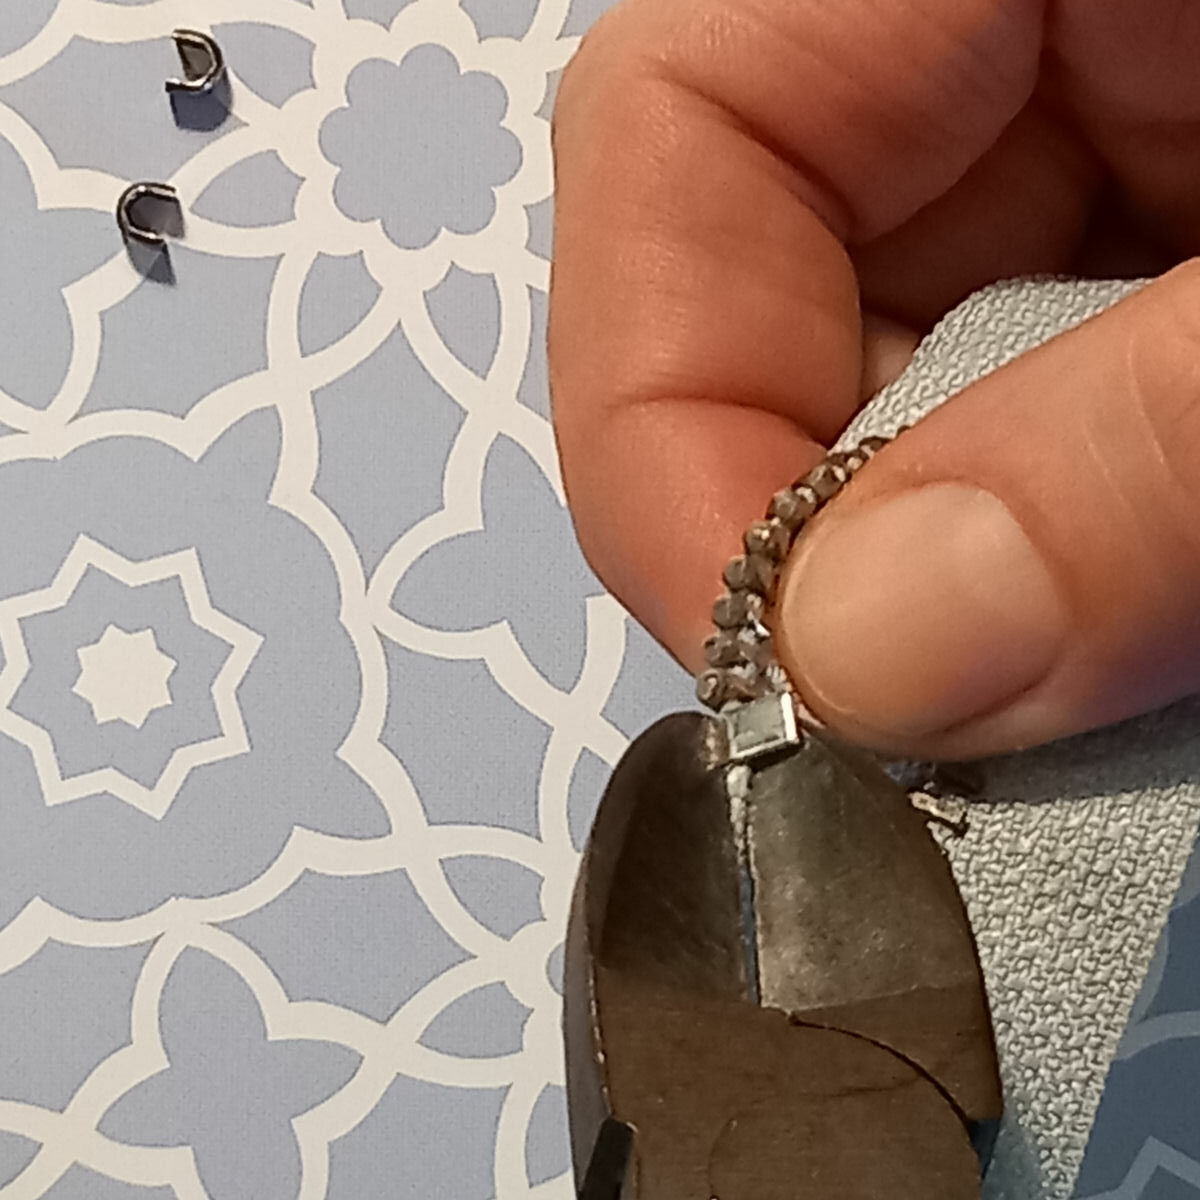
Place your side cutter pliers over the bottomstop as shown on the picture below and cut in half. Then pull the remnants out of the tape.
- Removing the bottomstop differently
There are some different kinds of bottomstops, because not every manufacturer uses the exact same parts. If cutting does not work, try to bend open the teeth of the bottomstop and removing it this way.
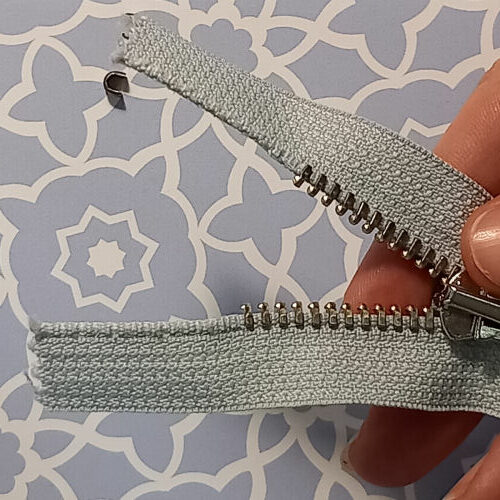
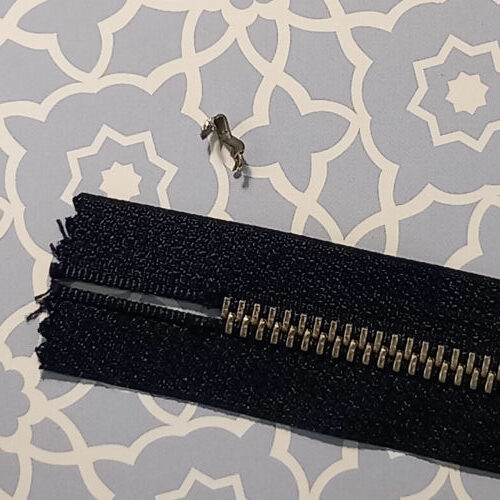
- A zip without a bottomstop
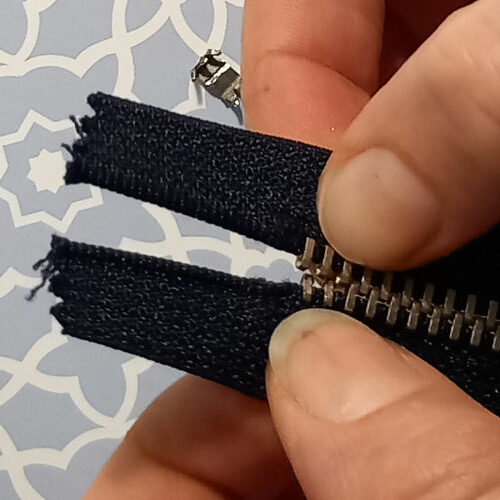
- O no, the zip opens from the bottom when I removed the bottomstop!
When a zip opens up from the bottom while removing the stop, use your fingers to push the teeth back together. By using your thumbs and index fingers make a slight wiggeling motion and the teeth should slot bank in place. This requires a bit of patience and practise…
- Attaching the bottomstop
Place the bottomstop on the tape of the zip just blow the last teeth. Remark: the zip needs to be closed for this! Now push through the teeth of the bottomstop to the other side of the tape or use a seamripper or tailor’s awl to push it through.
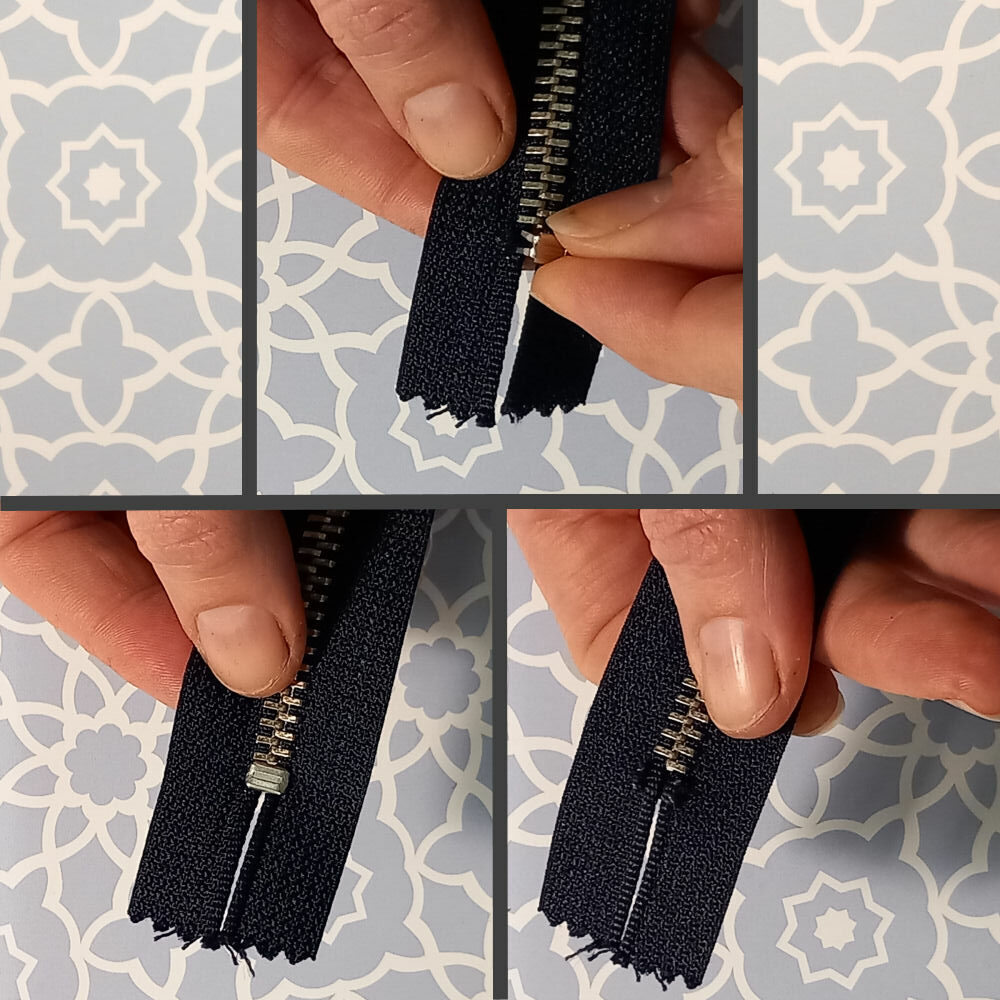
- Attaching the bottomstop – pushing in the teeth
Now you can fold over the tape to cover the bottomstop and (using the bent pliers) push the teeth inwards one by one. Because the tape is folded over the stop it is not in the way when you bend in the teeth of the bottomstop Tip: when the teeth don’t go in far enough you can place the bottomstop in a vise or pliers and flatten it out a bit (5).